How to Configure SAML 2.0 for eLeaP LMS
How to Configure SSO for Learning Management System
How to configure SAML 2.0 for eLeaP SSO
Azure SSO
Click here for instructions on setting up your Google SSO instance for eLeaP LMS.
Google SSO
Click here for instructions on setting up your Google SSO instance for eLeaP LMS.
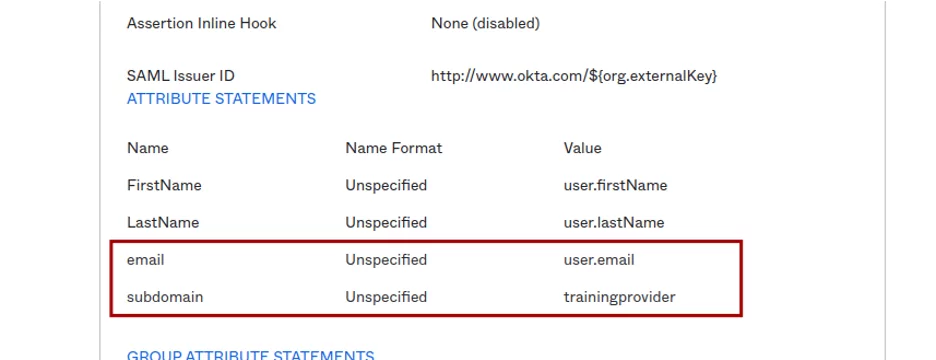
Okta SSO
Click here for instructions on setting up your Okta SSO instance for eLeaP LMS.
—–
Contact eLeaP to discuss any of these choices or even custom requirements you might have. We try to be as flexible as possible. Call us 1-877-624-7226 or email [email protected]
Additional information?